| Available Sculpture Sculpture in Public Places |
How is a Bronze Sculpture Made? |
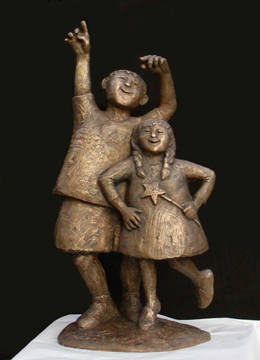 |
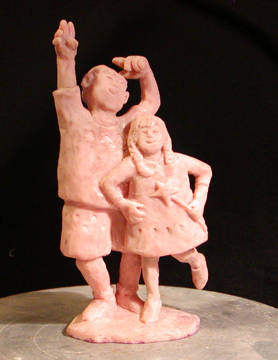
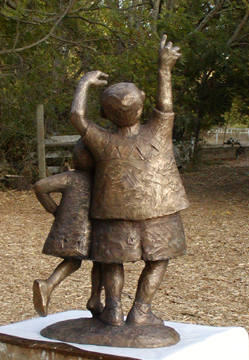
| "happy dance" A commissioned piece. Measuring 39 inches, (65cm) at the highest point. It is cast bronze, the original was clay. |
| The
following photos show the process of the creation of "happy
dance". It was started in June of 2002 and finished in October of 2003. |
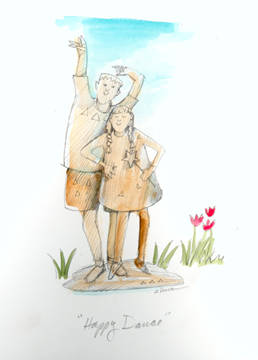
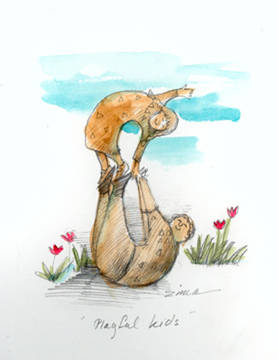
Paula was contacted by a family who was interested in having a sculpture made for them. Together they discussed ideas for the piece. They wanted the sculpture to represent their two lively children. Familiar with Zima's work, they were not looking for a realistic rendition. They sent photos of the kids, along with descriptions of their natures. From this information, Paula came up with several sketches to choose from. They picked the one the family liked the best, and with a few suggestions, the project was started. |
  |
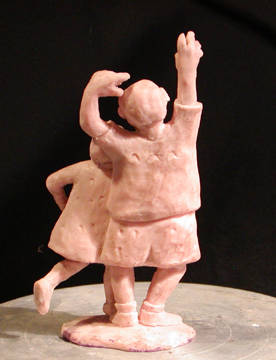
| These next two photos show the
maquette, which measures about 12 cm, or 5 inches, tall. Paula doesn't always make a maquette, but it sometimes helps. The family lives out of state, so photographs were sent for them to see, and approve. |
  |
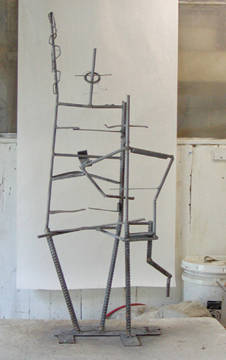
| These photos (below) show the
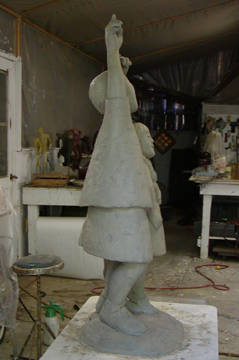
steel armature, which was necessary in order to support the weight of the clay, which will be 150 #'s or more. The clay is being slapped onto the armature, It is important to get it on there good and firm, so that the clay won't slump down. |
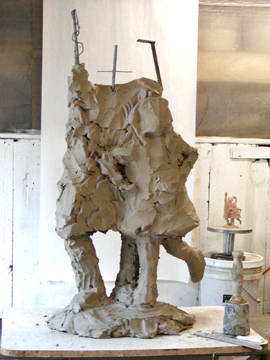 |
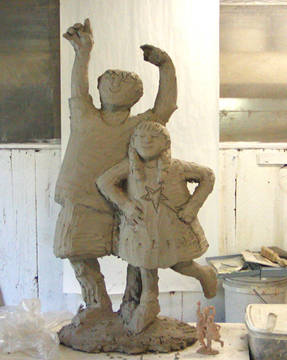
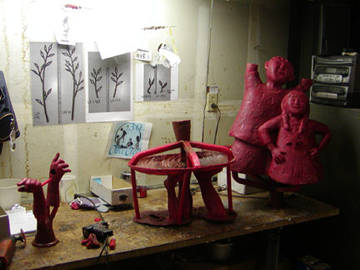
| Here the clay is beginning to
show the form, the next photo shows the sculpture almost complete. At first the work always seems to go quickly, it may of taken only a day or two to reach the first stage. Then, the work slows down, as the smaller detail is considered. It could take weeks to get it to the final stage. Sometimes a piece has to just wait, carefully wrapped in plastic to keep the clay moist, until the time is right, to know what the next step to take is. |
 |
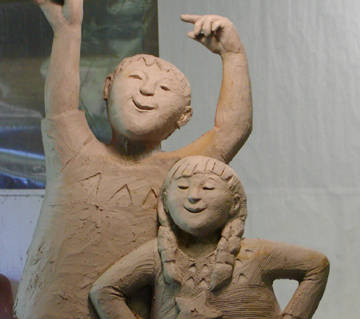
| 'happy dance" from the side, and then a close up of the faces. |
  |
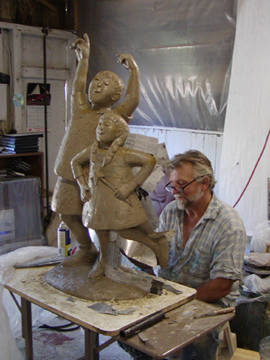
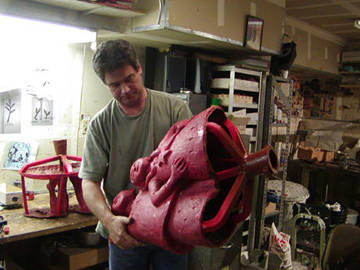
| When the
clay work was finally finished, photos were taken so the family could see the sculptures' progress and make sure that they were happy with how it turned out. The next step is to prepare the mold. Sometimes the mold is made right in the sculpture studio. First a thin metal dam is placed along the parting line. (Where the edges of the mold will come together.) Then the first layer of mold rubber is put on. It is layered on several times until it reaches just the right thickness. |
 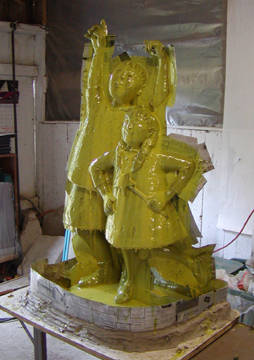 |
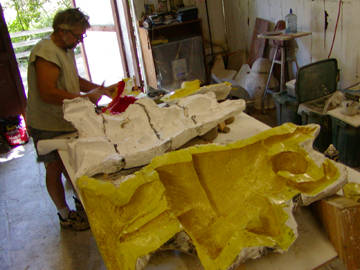
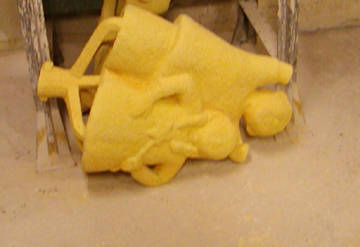
| The left
photo shows a bit of the final thick, mold, which in this case is a
bright yellow, with a plaster "mother mold" on top of it, for strengthening the rubber mold. The mother mold is applied before the mold rubber is removed from the original clay sculpture. The right hand photo shows the rubber mold for the back half of the sculpture, lying on the table, supported by the mother mold. |
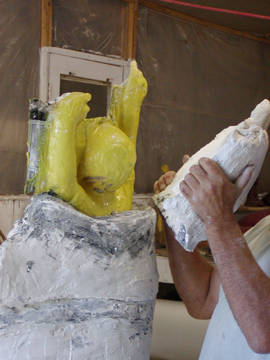  |
| The next step is to brush a layer
of wax into the mold, about 5mm, or 3/16 ", thick. After the wax cools, it is removed from the molds, and all parts are seamed together. Now you have a hollow, 5mm thick, wax replica of the original sculpture. This has to be worked to remove any imperfections that may of occured in the process. The next photo shows the "cleaned-up" wax at the foundry. You can see that it is not completely put together. It will get cut apart even farther, depending on how the foundry decides is best, in order to cast it correctly. Every foundry looks a bit different, and most of them have their own way of doing things, but this is the basic idea, which remains the same. |
  |
| Here you see the wax sprues,
that are used to hold the wax sculpture in position. The arms have been removed and will be cast separately, as will the legs, and base and the girls' leg that was kicking out to the side. The next photo shows the main part of the sculpture with the wax sprues. They will become the channels for the bronze to be poured down, and vents for the air to excape from. |
  |
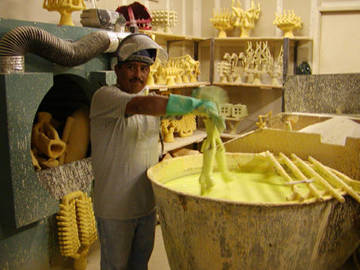
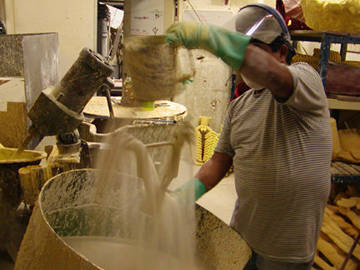
| This shows the arms being dipped
into the slurry, carefully, to be sure that it is
completely covered inside and out. Next, while the slurry is still wet, it is coated with a silicon sand. All the individual pieces will then be put up on a shelf to dry. The process will happen usually two more times, until a strong, thick shell is built up. |
 |
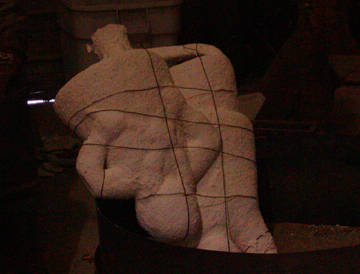
| Here is the main part of the
sculpture, with it's finished, dried shell, is a
bright yellow at
this point. The next step, after the shells are thoroughly dried, is to place them in a large kiln, where the intense heat melts the wax, which flows down and out, and is burned out of the shell. Because the shell is quite large, it has been wrapped with wire for extra support to keep it from breaking. |
  |
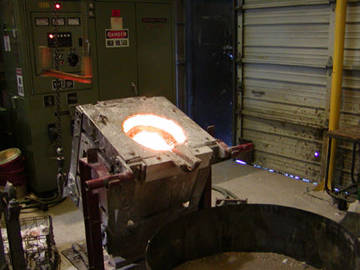
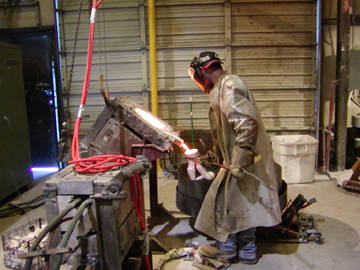
| These
two photos show the furnace where the bronze bars are being melted, soon to be poured into the waiting shell. |
  |
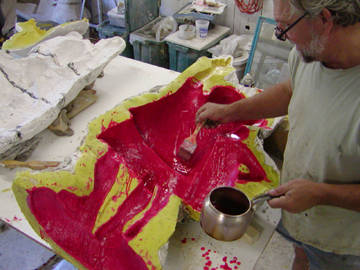
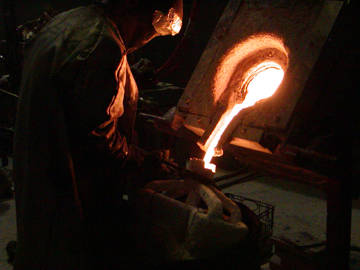
| The bronze is being poured out of
the crucible, into one of the smaller shells. This is an exciting time at the foundry. The roar of the furnace, the possible danger. Some foundrys do this with a large audience, music, and great splashing of the firey molten bronze. Other foundries do it quietly and precisely, with no extra drama. Either way, it is compelling to watch. The next, darker photo, shows the molten bronze being poured into the larger shell of the main part of the sculpture. |
  |
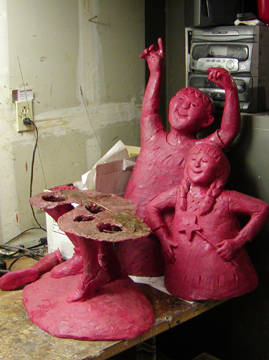
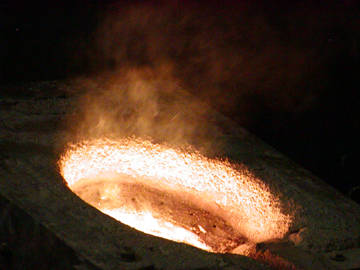
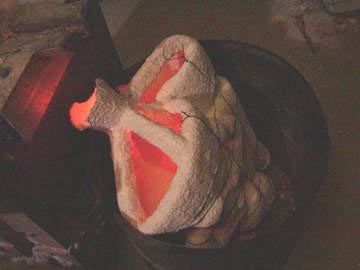
| Here you can see the bronze, just
after it was poured into the shell. It looks bright red, like the skin of a persimmon, but it is molten bronze. It will have to cool for a while, to become solid, then the shell will be broken away. After all of the parts have been cast, and cooled, and the shells broken off, the parts are welded together. Now, you have a bronze casting of the original clay sculpture. The bronze is the same thickness as was the red wax that was brushed into the rubber mold. The sculpture is hollow. |
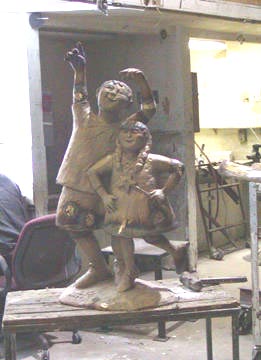 |
| The next step is to carefully
grind and polish away any imperfections caused by the welding, and to rework the texture that was lost where the seams were made. After the artist is happy with how the work looks, a chemical patina is applied to the raw bronze. In this case, it is a simple outdoor patina, for a pre-aged look. A coat of Johnsons' Paste Wax was applied to the sculpture in order to protect the patina. |
 |
| Large
stainless steel bolts were welded to the underside of the base for
mounting. The final step is to have a crate made, and ship "happy dance" to it's new home. (the title is not capitalized at the request of the family, who love e.e. cummings.) |
|
(mag.i.cal : beautiful or delightful in such a way as to seem removed from everyday life) |
 Copyright Statement click here to read Paintings, Sculpture and all contents of this site Copyright 2019 Paula Zima All Rights Reserved |